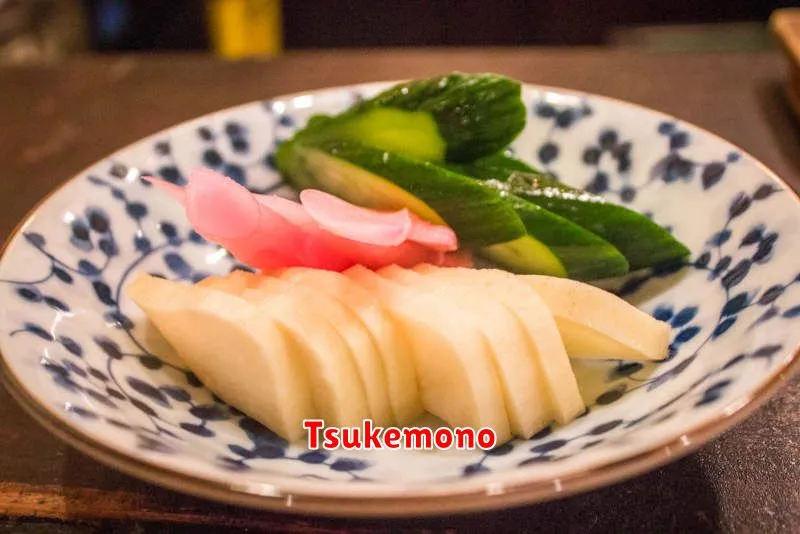
Embark on a culinary journey through the vibrant world of Japanese pickles with these 10 tsukemono recipes. From the crisp bite of takuan to the refreshing tang of kyurizuke, explore the diverse flavors and textures that tsukemono bring to Japanese cuisine. Whether you’re a seasoned pickling enthusiast or just beginning to discover the art of Japanese pickles, this collection of tsukemono recipes offers a delicious and accessible introduction to this essential element of Japanese culinary tradition. Discover how to make tsukemono at home and elevate your meals with the unique taste of these Japanese pickles.
Refreshing Umeboshi Cabbage Salad
This simple and flavorful cabbage salad is a perfect side dish for any meal. The salty tang of umeboshi (pickled plums) combined with the savory bonito flakes creates a unique and refreshing taste. This recipe is easy to make in large batches, making it ideal for meal prepping or potlucks.
Ingredients
- 1/2 head of cabbage
- 1-2 umeboshi (pickled plums)
- 2g bonito flakes
- 1 teaspoon soy sauce
- Salt to taste
Instructions
- Lightly boil the cabbage and thoroughly squeeze out the excess water. Then, simply combine all ingredients in a bowl and mix well. For a summer twist, chill thoroughly before serving and enjoy a generous portion!
Simple Fukujinzuke Egg Rice
This recipe provides a quick and easy way to enjoy a flavorful Japanese-inspired rice bowl. Using just a few simple ingredients, you can create a satisfying meal in minutes.
Ingredients
- 1 bowl cooked rice (multigrain rice recommended)
- 1 egg
- 1 heaping tablespoon fukujinzuke (Japanese pickles)
- Soy sauce, to taste
Instructions
- Place the cooked rice in a bowl.
- Add the raw egg and fukujinzuke on top of the rice.
- Mix well to combine all ingredients.
- For those who prefer a more intense flavor, add soy sauce to taste.
- Optional: This dish pairs well with natto.
Enjoy this simple and delicious Fukujinzuke Egg Rice!
Juicy Grilled Chicken Skewers with Tangy Umeboshi Glaze
This recipe offers a simple yet flavorful way to enjoy grilled chicken. Tender chicken pieces are skewered and cooked to perfection, then glazed with a bright and tangy umeboshi sauce. The addition of shiso leaves adds a refreshing herbal note.
Ingredients:
- 3 chicken tenders
- 1 large umeboshi (pickled plum)
- 2 teaspoons mirin
- 1 tablespoon sake
- Salt, to taste
- Shiso leaves, to taste
Instructions:
- Prepare the Chicken: Remove the tendons from the chicken tenders and cut into bite-sized pieces. Thread the chicken onto skewers and season lightly with salt.
- Make the Umeboshi Glaze: Pit the umeboshi and finely chop. Combine the chopped umeboshi and mirin in a bowl and microwave at 600W for 40 seconds.
- Grill the Chicken: Line a frying pan with parchment paper. Place the chicken skewers on the parchment paper and grill over high heat until browned on both sides.
- Steam the Chicken: Once browned, sprinkle the chicken with sake, cover the pan with a lid, and steam for 1-2 minutes to ensure the chicken is cooked through.
- Serve: Transfer the cooked chicken skewers to a serving plate. Drizzle generously with the umeboshi glaze. Garnish with fresh shiso leaves (optional: soak shiso leaves in water beforehand for added freshness).
Fresh Scallop Carpaccio with Umeboshi Dressing
This recipe provides a simple yet elegant way to enjoy fresh, sashimi-grade scallops. The star of the dish is a vibrant umeboshi dressing that perfectly complements the delicate sweetness of the scallops. It’s quick to prepare, making it a perfect appetizer or light meal.
Ingredients
For the Scallops:
- 5 fresh scallop adductor muscles (sashimi-grade)
For the Umeboshi Dressing:
- 1 umeboshi plum (pickled with shiso and 8% salt content recommended)
- 1 tablespoon Spanish extra virgin olive oil
- 1/2 teaspoon grated garlic
- 1/2 teaspoon white dashi
- 1/2 teaspoon mirin
- 1/2 teaspoon sugar
- 1/2 teaspoon vinegar
- 1 pinch black pepper
For Garnish:
- Vegetables of your choice (e.g., baby greens)
- Fresh parsley (optional)
Instructions
-
Prepare the Umeboshi Paste: If using a whole umeboshi plum, remove the pit and mash the flesh into a paste.
-
Make the Umeboshi Dressing: In a small bowl, thoroughly combine the olive oil, umeboshi paste, and grated garlic.
-
Complete the Dressing: Add the white dashi, mirin, sugar, vinegar, and black pepper to the umeboshi mixture. Whisk well to combine all ingredients.
-
Prepare the Scallops: Slice each scallop horizontally in half to create thinner pieces.
-
Assemble and Serve: Arrange your chosen vegetables on a plate. Place the sliced scallops on top of the vegetables. Drizzle generously with the umeboshi dressing. Garnish with fresh parsley, if desired.
Quick & Healthy Onion Ohitashi
This simple and budget-friendly Onion Ohitashi recipe is a delightful Japanese side dish that’s ready in minutes. It’s a healthy and flavorful way to enjoy onions.
Ingredients
- 1 onion
- Ponzu sauce, to taste
- Bonito flakes, to taste
- Toasted sesame seeds, to taste
- Pinch of salt (for boiling)
Instructions
-
Thinly Slice the Onion: Cut the onion in half lengthwise, then slice thinly (about 1mm) along the grain. A mandoline slicer can be helpful for achieving uniform slices.
-
Blanch the Onion: Bring a pot of water to a boil. Add a pinch of salt and the sliced onion. Boil for about 10 seconds until slightly softened.
-
Drain and Cool: Drain the onion in a colander and spread it out to cool. Gently press to remove excess water.
-
Serve and Enjoy: Arrange the cooled onion on a plate. Sprinkle with toasted sesame seeds and bonito flakes. Just before serving, drizzle with ponzu sauce to taste.
Savory Umeboshi and Bonito Onigiri
This recipe guides you through making delicious onigiri (Japanese rice balls) filled with a savory mixture of umeboshi (pickled plum) and bonito flakes. It’s a quick and easy snack or light meal.
Ingredients
- 2 servings of warm cooked rice
- 1 large umeboshi (pickled plum)
- 1/2 pack bonito flakes
- 1 dash soy sauce
- 2 sheets nori (seaweed)
- Salt to taste
Instructions
-
Prepare the Filling: Remove the pit from the umeboshi and finely chop it. Combine the chopped umeboshi with the bonito flakes and soy sauce in a small bowl.
-
Assemble the Onigiri: Place a sheet of plastic wrap on a plate and lightly sprinkle it with salt. Spread half of the warm rice on the plastic wrap. Evenly distribute the umeboshi mixture over the rice.
-
Shape and Wrap: Place the remaining rice on top of the umeboshi mixture and sprinkle with salt again. Gently shape the rice into a triangle (or your preferred shape). Wrap a sheet of nori around the rice ball to secure it.
Savory Beef Sushi Rice
This recipe provides a simple and flavorful way to enjoy sushi rice with a savory twist. Featuring thinly sliced beef simmered in a sweet and savory sauce, combined with sushi rice, pickled radish, and fragrant shiso leaves, this dish offers a delicious alternative to traditional sushi. It’s perfect for a quick meal, potlucks, or parties.
Ingredients
- Rice: 2 cups
- Beef: 200g thinly sliced
- Pickled Radish (Takuan): 70g
- Soy Sauce: 2-2 1/2 tablespoons
- Sake: 2 tablespoons
- Sugar: 1 1/2-2 tablespoons
- Shiso Leaves: 6 or more
- Toasted Sesame Seeds (White): To taste
- Shredded Nori Seaweed: To taste
- Sushi Vinegar (store-bought is acceptable):
- Vinegar: 3 generous tablespoons
- Sugar: 2 tablespoons
- Salt: 1 pinch
- Cooking Oil: (amount not specified)
Instructions
1. Prepare Sushi Vinegar: Combine vinegar, sugar, and salt in a bowl, mixing until the sugar dissolves completely.
2. Cook Rice: Cook rice slightly firmer than usual. Transfer cooked rice to a large bowl, mix with the prepared sushi vinegar, and let it cool.
3. Sauté Beef: Heat oil in a frying pan and sauté the beef. Once the beef changes color, add soy sauce, sake, and sugar. Simmer until the liquid reduces by half, being careful not to overcook the beef.
4. Prepare Remaining Ingredients: While the beef simmers, finely chop the pickled radish and thinly slice the shiso leaves. The beef will absorb the remaining sauce while resting.
5. Combine Ingredients: Cut the beef into 1cm wide strips. Mix the remaining sauce from the pan with the cooled sushi rice. Add the chopped beef, pickled radish, and shiso leaves to the rice.
6. Garnish and Serve: Sprinkle with toasted sesame seeds and shredded nori seaweed. Garnish with additional shiso leaves. Serve and enjoy!
Crispy Chicken & Ume Gyoza with Shiso and Cheese
These flavorful gyoza are packed with a delicious combination of savory chicken, salty umeboshi (pickled plum), fragrant shiso, and melted cheese, all encased in a crispy pan-fried wrapper. This recipe is easy to follow and delivers a truly satisfying meal.
Ingredients
- 2 chicken tenders
- 5 shiso leaves
- 2 slices melting cheese
- 10 gyoza wrappers
- 10g Umeboshi paste (or whole umeboshi)
- Oil (olive oil is fine)
Instructions
-
Cook the Chicken: Boil water and cook the chicken tenders until fully cooked.
-
Shred the Chicken: Once cooked, shred the chicken into smaller pieces.
-
Prepare the Umeboshi and Shiso: If using whole umeboshi, remove the pits and mash them into a paste. Remove the stems from the shiso leaves and tear each leaf in half.
-
Assemble the Gyoza: Lay a gyoza wrapper flat. Place half a shiso leaf, a portion of cheese, shredded chicken, and a small amount of umeboshi paste in the center of the wrapper. Moisten the edges of the wrapper with water and fold it over to create a half-moon shape, pressing firmly to seal.
-
Pan-fry the Gyoza: Heat a generous amount of oil in a frying pan over medium heat. Place the gyoza in the pan and cook until they are golden brown and crispy on both sides.
-
Serve: Plate the crispy gyoza and serve immediately. Enjoy!
Creamy Avocado and Pistachio Crostini
This simple yet elegant appetizer is perfect for any occasion. Ripe avocado and salty pistachios combine to create a vibrant green cream, brightened with lemon and deepened with a touch of cumin. Served on crisp baguette slices and garnished with fresh chives and a hint of tangy umeboshi paste, these crostini are a delightful treat for the palate.
Ingredients
- 1 large ripe avocado
- 1 large peeled and chopped tomato
- 1/2 cup shelled pistachios (about 50 grams)
- 2 tablespoons flaxseed oil
- 1 teaspoon umeboshi plum paste
- A few chives
- 1 pinch ground cumin
- Juice and grated zest of 1 small lemon
- Freshly ground black pepper
- Himalayan salt
- 1 baguette
Instructions
- Prepare the ingredients: Cut the avocado in half lengthwise, remove the pit, and scoop out the flesh. Grate the lemon zest and squeeze the juice. Finely chop the chives, reserving some for garnish. Set aside a few pistachios for garnish as well.
- Make the avocado cream: In a blender, combine the avocado flesh, lemon juice and zest, most of the chives, most of the pistachios, the chopped tomato, and flaxseed oil. Season with freshly ground black pepper, a pinch of cumin, and Himalayan salt. Blend until completely smooth.
- Chill: Cover the avocado cream and refrigerate until ready to serve. This allows the flavors to meld.
- Assemble the crostini: Slice the baguette into medium-thick rounds. Spread the chilled avocado and pistachio cream generously on each slice. Garnish with the reserved chives, pistachios, and a small dab of umeboshi paste for a touch of umami.
How to Make Delicious Okonomiyaki (Japanese Savory Pancake)
This recipe guides you through making okonomiyaki, a savory Japanese pancake. Often called “Japanese pizza,” okonomiyaki is a flavorful and customizable dish. Follow these steps to create your own delicious okonomiyaki at home.
Ingredients
- Batter:
- 1 2/3 cups flour (about 200 grams)
- 2 eggs
- 3/4 cup water (about 200 grams)
- 1/2 teaspoon salt
- Filling:
- 8 ounces cabbage (about 220 grams), thinly sliced and chopped
- Green part of a scallion, sliced
- Pickled ginger (gari), chopped (optional)
- 10 1/2 ounces cleaned shrimp (about 300 grams), chopped
- 2 slices bacon or pork cheek
- Cooking & Toppings:
- Sunflower or peanut oil
- Okonomiyaki sauce
- Japanese mayonnaise (Kewpie)
- Dried tuna flakes (katsuobushi)
- Nori seaweed (optional)
Instructions
-
Make the batter: In a bowl, whisk together the flour, salt, and eggs. Gradually add the water while whisking constantly to prevent lumps. Continue mixing until smooth.
-
Prepare the cabbage: Remove the core from the cabbage and thinly slice it. Chop the slices further into smaller pieces.
-
Add vegetables to batter: Slice the green part of the scallion and chop the pickled ginger (if using). Add the cabbage, scallion, and ginger to the batter and mix well.
-
Prepare the protein: Chop the shrimp and slice the bacon or pork cheek. Set aside a portion of the pork cheek for topping.
-
Combine protein and batter: Add the chopped shrimp and most of the pork cheek to the batter. Mix thoroughly.
-
Cook the okonomiyaki: Heat oil in a griddle or non-stick pan over medium heat. Pour a portion of the batter onto the hot surface and spread it into a circle. Arrange the reserved pork cheek slices on top. Cook for several minutes until the bottom is golden brown.
-
Flip and finish cooking: Carefully flip the okonomiyaki using a large spatula. Cook the other side until golden brown and cooked through.
-
Add toppings and serve: Transfer the cooked okonomiyaki to a plate. Drizzle with okonomiyaki sauce in a zigzag pattern, then add parallel lines of Japanese mayonnaise. Sprinkle generously with dried tuna flakes. Serve immediately while hot, optionally garnished with nori seaweed.
History of Tsukemono
Tsukemono, the Japanese art of pickling, boasts a rich history deeply intertwined with the country’s culinary evolution. Its origins can be traced back centuries, long before refrigeration was available. Initially, pickling served as a vital method of preservation, allowing people to enjoy seasonal vegetables throughout the year.
Early forms of tsukemono likely involved simple techniques like salting and drying vegetables. With the introduction of Buddhism from China, new ingredients and methods emerged, influencing the evolution of pickling practices. Ingredients like soy sauce, miso, and rice bran became incorporated, adding depth and complexity to the flavors.
Over time, tsukemono transitioned from a purely practical food preservation technique to a beloved culinary tradition. Different regions of Japan developed their own unique styles and specialties, incorporating local ingredients and reflecting regional preferences. From the simple salt-pickled hakusai (Chinese cabbage) to the vibrantly colored beni shoga (red pickled ginger), the diversity of tsukemono showcases the ingenuity and artistry of Japanese cuisine.
Today, tsukemono continues to be a staple in Japanese meals, appreciated not only for its flavor but also for its health benefits. These pickled delights are often served as a palate cleanser, a digestive aid, or simply as a flavorful accompaniment to rice and other dishes. The enduring popularity of tsukemono is a testament to its significance in Japanese culinary history and culture.
Nutritional Content and Benefits of Tsukemono
Tsukemono, while often enjoyed in small portions, can contribute to a healthy diet. The nutritional content varies greatly depending on the vegetables used and pickling method. For example, fermented tsukemono like Nukazuke are rich in probiotics, beneficial bacteria that support gut health and can improve digestion.
Many tsukemono are low in calories and fat, making them a guilt-free addition to a meal. They can be a good source of vitamins and minerals, depending on the main ingredients. Pickles made with leafy greens can offer Vitamin K, while others can contribute to your daily intake of Vitamin C or minerals like iron and calcium.
The pickling process itself can also enhance the nutritional value of certain vegetables. Fermentation, in particular, can increase the bioavailability of certain nutrients, making them easier for the body to absorb. Additionally, some tsukemono provide dietary fiber, promoting healthy bowel movements and overall digestive health.
It’s important to be mindful of the sodium content, which can be high in some tsukemono varieties, especially those brined in salt. Enjoying them as part of a balanced diet is key to reaping their potential health benefits.
Tips for Choosing Quality Vegetables for Tsukemono
Choosing the right vegetables is crucial for delicious tsukemono. Look for firm, unblemished vegetables that are free from bruises or soft spots. The fresher the vegetable, the better the flavor and texture of your pickles will be.
Consider the seasonality of vegetables. In-season produce is generally more flavorful and less expensive. Experiment with different varieties within each season to discover new favorites for your tsukemono adventures.
Pay attention to size and shape. Uniformly sized vegetables will pickle more evenly. For some tsukemono, smaller vegetables are preferred, while others benefit from larger ones. Consider the specific recipe when selecting your produce.
Don’t be afraid to embrace imperfect vegetables. While blemishes might not be ideal for presentation in other dishes, they often don’t affect the flavor of tsukemono. These “ugly” vegetables can be a great way to reduce food waste and save money. Just be sure to remove any bruised or damaged portions.