Craving a hearty and flavorful soup? Look no further than khash, a traditional beef soup known for its rich, collagen-packed broth. This comforting dish, perfect for chilly weather or a nourishing meal, is surprisingly simple to make, with various regional variations offering unique flavor profiles. Whether you’re a khash connoisseur or a curious newcomer, we’ve compiled 10 flavorful khash (beef soup) recipes to satisfy your culinary cravings. From classic Armenian khash to modern twists on this timeless favorite, these recipes will guide you through creating a delicious and satisfying bowl of beef soup that will warm you from the inside out. Get ready to explore the world of khash and discover your new favorite comfort food.
Spicy Green Chili Curry (Mirchon ka Salan)
This recipe guides you through making a flavorful and spicy green chili curry, a popular dish known as Mirchon ka Salan. It involves roasting and grinding a rich blend of spices, then simmering them with green chilies in a tangy tamarind-based sauce.
Ingredients
Spice Paste:
- 18-20 Green Chilies (adjust as needed)
- 2 tbsp Red Chili Powder (or to taste)
- 1 tbsp Turmeric Powder
- 50g Sesame Seeds
- 50g Poppy Seeds
- 25g Desiccated Coconut
- 25g Peanuts
- 1 medium Onion (chopped)
- 1/2 tbsp Cumin Seeds
- 1/4 tsp Fenugreek Seeds
Other Ingredients:
- Tamarind Pulp (1/2 cup or to taste)
- Fresh Coriander (for garnish)
- 1 cup Oil
- 1/2 tbsp Cumin Seeds
- Pinch of Fenugreek Seeds
- 8-10 Curry Leaves
- Salt (to taste)
Instructions
Preparing the Spice Paste:
- Dry roast each of the spices listed under “Spice Paste” separately until fragrant.
- Once cooled, grind all the roasted spices together into a smooth paste.
Making the Curry:
- Heat oil in a pot.
- Add cumin seeds, curry leaves, and fenugreek seeds. Let them splutter.
- Add the ground spice paste and salt. Sauté well until the oil starts to separate from the masala.
- Add the green chilies and stir to coat them with the masala.
- Pour 2 1/2 cups of water into the pot. Bring to a boil, then reduce the heat and let the chilies simmer until tender.
- Once the chilies are cooked, add tamarind pulp (adjust the amount to your preferred sourness). Simmer for another 5 minutes.
- Garnish with fresh coriander.
Serving:
Serve hot with boiled rice.
Slow-Cooked Minced Meat (Dum ka Qeema)
This recipe guides you through making a flavorful and tender slow-cooked minced meat dish known as “Dum ka Qeema”. It involves marinating the meat in a rich blend of spices and yogurt, then gently cooking it to perfection. The “dum” technique, using a hot coal to infuse a smoky flavor, adds a unique depth to this dish.
Ingredients
- Qeema (Minced Meat): 1 pound
- Onions: 2, golden brown
- Yogurt: 1/2 cup
- Ginger-Garlic Paste: 2 tsp
- Roasted Coconut Powder: 1 tbsp
- Roasted Poppy Seeds (Kaash Khash): 1 tbsp
- Roasted Almond Powder: 1 tbsp
- Roasted Chickpea Flour (Phoolay Chanay): 1 tbsp
- Salt: As needed
- Red Chili Powder: 1 tsp
- Cumin Powder: 1 tsp
- Garam Masala: 1 tsp
- Potatoes: 2, peeled and sliced
- Mint Leaves: A handful
- Green Chilies: 2, chopped
- Cilantro: 1/2 cup
Instructions
-
Marination: In a large bowl, combine the yogurt, all the spices (red chili powder, cumin powder, garam masala), roasted poppy seeds, roasted almond powder, roasted chickpea flour, browned onions, and salt. Mix well to create a smooth paste. Add the minced meat (qeema) to this marinade, ensuring it’s thoroughly coated. Cover the bowl and refrigerate for 1-2 hours to allow the flavors to meld.
-
Cooking the Qeema: Heat oil in a pot. Add the marinated qeema and sauté for 10 minutes. Cover the pot and let it simmer for 20 minutes, allowing the meat to cook thoroughly. Stir in the mint leaves, cilantro, and green chilies.
-
Adding Potatoes: Lightly sauté the sliced potatoes in a separate pan with a little oil until slightly softened. Add these potatoes to the qeema.
-
Dum Technique: Cover the pot tightly and let the qeema simmer on low heat (dum) for 10 minutes. Heat a piece of charcoal until it’s red hot. Place a small piece of foil directly on the qeema. Carefully place the hot coal on the foil and add a drop of oil to it. Immediately cover the pot tightly to trap the smoke and allow it to infuse the qeema with a smoky flavor.
-
Serving: Garnish the Dum ka Qeema with fresh mint leaves, green chilies, and lemon slices (optional) before serving.
Delicious Dum Qeema Recipe
This recipe provides a step-by-step guide to making a flavorful and aromatic Dum Qeema dish. It emphasizes the importance of marination for a tender and infused final product.
Ingredients:
- 1kg Qeema (Ground Meat)
- 2 Onions
- 2 tbsp Ginger-Garlic Paste
- 2 tbsp Green Chili Paste
- 1 tsp Red Chili Powder
- 1 tsp Turmeric Powder
- 1 tsp Garam Masala Powder
- 1 tsp Black Pepper
- 1 tsp Crushed Red Chili
- 1 tbsp Cumin Seeds
- 1 tbsp Whole Coriander Seeds
- 1 tbsp Poppy Seeds (Khash Khash)
- 1 tbsp Roasted Chickpea Flour (Bhony Chany)
- 1 cup Yogurt
- 2 tbsp Oil
- ½ cup Fresh Coriander
- 3 tbsp Green Chilies (Slit)
- 8-10 Mint Leaves
Instructions:
- Spice Preparation: Dry roast cumin seeds, coriander seeds, and poppy seeds. Add roasted chickpea flour and grind into a powder.
- Marination: Whisk the yogurt and combine it with all the spices (except the onions and oil). Add the ground meat (qeema) and mix thoroughly. Marinate for at least 1 hour to allow the flavors to meld.
- Browning the Qeema: Heat oil in a pan and fry the onions until light golden brown. Add the marinated qeema and cook until the water evaporates.
- Simmering: Add a little water to the pan, cover, and cook until the qeema is tender.
- Finishing Touches: Cook uncovered for another 5 minutes. Stir in half of the fresh coriander, green chilies, and mint leaves. For a smoky flavor, add a piece of burning charcoal on a small metal piece to the qeema, cover immediately and let the smoke infuse for a few minutes.
- Serving: Transfer the Dum Qeema to a serving bowl and garnish with the remaining fresh coriander, green chilies, and mint leaves. Serve hot and enjoy!
Nargisi Koftay: Egg-Stuffed Meatballs in a Rich Gravy
This recipe guides you through making delicious Nargisi Koftay, featuring flavorful meatballs stuffed with hard-boiled eggs and simmered in a rich and aromatic gravy. The dish combines spiced ground beef with a unique blend of ingredients, creating a truly satisfying meal.
Ingredients
For the Koftay (Meatballs):
- 300g ground beef
- 1 tbsp chickpea flour
- 1 tbsp poppy seeds (khashkhaash)
- 1/2 tsp red chili powder
- 1/4 tsp garam masala powder
- 1 slice bread (soaked in milk)
- 2 tbsp brown onion paste
- 1/2 tsp ginger-garlic paste
- 3 hard-boiled eggs
- 1 tbsp rice
- Salt to taste
- 1 green chili, chopped
- 2 tbsp coriander leaves, chopped
- 2 tbsp chopped onion
For the Gravy:
- 1 large onion
- 1/2 cup oil
- 1 tsp red chili powder
- 1/2 tsp turmeric powder
- 1 tsp coriander powder
- Salt to taste
- 1/2 tsp garam masala powder
- 1/4 cup yogurt
- 1 tbsp ginger-garlic paste
- 1 tomato
- 3 green chilies, chopped
- 4 tbsp coriander leaves, chopped
Instructions
Preparing the Koftay:
- Soak the rice in water for an hour. Wash and strain the poppy seeds (khashkhaash), then grind them into a paste. Grind the chickpeas into a powder.
- Combine the ground beef, chopped onion, ginger-garlic paste, soaked bread, chopped green chili, chopped coriander leaves, chickpea powder, red chili powder, poppy seed paste, and soaked rice in a food processor. Pulse for 6-7 seconds until well combined. With greased hands, take portions of the mixture, flatten them in your palm, place a hard-boiled egg in the center, and shape the meat around the egg to seal it completely, forming the koftay.
- Lightly fry the large onion in oil until golden brown. Then, blend it into a paste with the yogurt and tomato.
- Heat oil in a pot and sauté the ginger-garlic paste. Add the onion-yogurt-tomato paste and cook until fragrant. Add a little water if needed. Stir in the red chili powder, turmeric powder, coriander powder, and salt. Cook for a few minutes. Add half a cup of water and gently place the prepared koftay into the gravy. Cook over medium heat for 10 minutes without stirring.
- Add garam masala powder, chopped green chilies, and chopped coriander leaves to the gravy. Cook for 1 minute. Cut the koftay lengthwise and serve hot with chapati.
Spicy Roasted Eggplant Curry (Bhagary Baingan)
This recipe details how to make a delicious and flavorful Spicy Roasted Eggplant Curry, also known as Bhagary Baingan. This dish features tender eggplant roasted with a rich blend of spices and tangy tamarind pulp.
Ingredients
For the Eggplant:
- 500g small, white eggplants
- Salt
For the Spice Paste:
- 2 tbsp red chili powder (or to taste)
- 1 tbsp turmeric powder
- 50g sesame seeds
- 50g poppy seeds
- 25g desiccated coconut
- 25g split mung beans
- 1 medium onion, grated
- ½ tbsp cumin seeds
- ¼ tsp fenugreek seeds
Other Ingredients:
- Salt to taste
- ½ cup tamarind pulp (or to taste)
- Fresh cilantro for garnish (optional)
- 1 cup oil
For the Tempering (Bhagar):
- ½ tbsp cumin seeds
- 1 pinch fenugreek seeds
- 8-10 curry leaves
Instructions
Prepare the Eggplant: Wash the eggplants and lightly score them with 4 cuts each. Submerge them in salted water.
Prepare the Spice Paste: Dry roast each of the spice paste ingredients separately until fragrant. Then, grind them together into a fine paste.
Cook the Curry:
- Heat the oil in a large pot.
- Add the cumin seeds, curry leaves, and fenugreek seeds for the tempering. Cook until fragrant.
- Add the ground spice paste and salt. Roast well until the oil begins to separate.
- Add the eggplants and stir to coat them evenly with the spice paste.
- Add 2 cups of water and bring to a boil over high heat.
- Reduce the heat to low and simmer until the eggplants are tender.
- Add the tamarind pulp (adjust to your desired sourness) and cook for another 5 minutes.
- Garnish with fresh cilantro, if desired.
Serve hot with boiled rice.
Delicious Kofty Recipe
This recipe guides you through making delicious kofty. It involves preparing the kofty mixture, creating a flavorful sauce, and simmering everything together for a hearty and satisfying meal.
Ingredients
For the Kofty:
- 500g minced meat
- 3-4 medium onions
- 2 tbsp ginger-garlic paste
- 1 tbsp red chili powder
- 1 tsp turmeric powder
- 1 tbsp coriander powder
- 1 tbsp garam masala
- 1/2 bunch fresh coriander
- 2 tbsp green chili paste
- 2 medium potatoes
- 3 tbsp oil
- 2 medium tomatoes
- Salt to taste
For the Sauce:
- 1/2 cup yogurt
- 1 tbsp poppy seeds (khash khash)
- 2 tbsp roasted chickpeas (bhuny chany)
Instructions
Step 1: Prepare the Kofty Mixture
Combine the minced meat, ginger-garlic paste, paste of 3-4 onions, green chili paste, chopped fresh coriander, garam masala, coriander powder, salt, red chili powder, and turmeric powder in a bowl. Mix well and shape the mixture into small kofty balls.
Step 2: Sauté the Aromatics
Heat the oil in a pan over medium heat. Add the onion paste and cook until softened. Add the ginger-garlic paste and fry until fragrant. Then, add the tomato paste (made by boiling and blending tomatoes) and fry until the oil separates.
Step 3: Prepare the Sauce Base
Add the red chili powder, turmeric powder, and green chili paste to the pan. Sauté the spices, then add the coriander powder and garam masala. Continue to sauté, then add the yogurt and cook until the sauce thickens.
Step 4: Add Potatoes and Kofty
Add the diced potatoes to the sauce and cook until slightly softened. Add the kofty balls, add a little water, cover the pan, and simmer over low heat until the kofty are cooked through.
Step 5: Finishing Touches
Grind the poppy seeds and roasted chickpeas into a paste with a little water. Pour this paste over the kofty and allow it to simmer for 5 minutes.
Step 6: Serve
Garnish with fresh coriander and serve hot.
A Traditional Gujarati Thali for Ganesh Chaturthi
This recipe guides you through preparing a delicious and authentic Gujarati thali to celebrate Ganesh Chaturthi. The thali includes Bhakri na Laddu (sweet wheat balls), Batata nu Shaak (potato curry), Gujarati Dal (lentil soup), Steamed Rice, and Roti (flatbread), complemented by traditional accompaniments.
Bhakri na Laddu
These sweet wheat balls are a delightful treat. Combine whole wheat flour, semolina, oil, and warm milk to form a dough. Divide the dough into small portions. Prepare a jaggery syrup by melting jaggery with ghee. Combine the dough portions with the jaggery syrup, cardamom powder, and raisins. Shape into small balls, garnish with roasted cashews and poppy seeds (khash khash).
Batata nu Shaak
This flavorful potato curry starts with a fragrant tempering of cumin seeds, bay leaf, cloves, and asafoetida in oil. Add turmeric, chili powder, and coriander powder, followed by tomato paste. Sauté until the oil separates. Add boiled and cubed potatoes and salt. Add water, cover, and simmer until the potatoes absorb the flavors. Mash some potatoes for a thicker consistency. Garnish with fresh coriander leaves.
Gujarati Dal
This lentil soup is a staple in Gujarati cuisine. Pressure cook toor dal with tomatoes, kokum, turmeric, chili powder, coriander powder, cumin powder, garam masala, a slit green chili, ginger paste, salt, jaggery, and oil. Separately boil peanuts. Once the dal is cooked, whisk until smooth. Add water and the boiled peanuts. Simmer until the flavors meld. Prepare a tempering with ghee, mustard seeds, cumin seeds, cinnamon, and dried red chilies. Pour the tempering over the dal and garnish with coriander leaves.
Steamed Rice
Perfectly steamed rice complements the thali. Boil water with salt and add basmati rice. Reduce heat, cover, and simmer until the rice is tender and the water is absorbed. Let it rest before fluffing with a fork.
Roti
Soft rotis are a must-have. Combine wheat flour, salt, and oil. Add water and knead into a soft dough. Divide the dough into equal portions and roll each into a circle. Cook the rotis on a hot tava (griddle) until they puff up and brown spots appear. Flip and cook the other side. Apply ghee and serve hot.
Serving the Thali
Arrange all the prepared dishes on a thali (platter). Serve with traditional accompaniments like pickle (achar), papad, buttermilk, and masala row mongo (sprouted mung beans). Water is also typically served alongside.
Delicious Sheer Khurma Recipe
This recipe guides you through making a rich and creamy Sheer Khurma, a traditional festive dessert. It highlights the key ingredients and steps involved in preparing this delightful treat.
Ingredients:
- 100g Almonds
- 100g Pistachios
- 3 tablespoons Poppy Seeds (Khashkhash)
- Cardamom (Elaichi)
- Desiccated Coconut (Khopra)
- Vermicelli (Sevayya)
- Dates (Kharekh)
- Pistachio Paste
- Milk
- Sugar
- Saffron (Keshar) (Optional)
Instructions:
First, roast the vermicelli in ghee until golden brown. Then, add milk and bring it to a boil. Incorporate the cardamom, pre-soaked almonds, pistachios, dates, poppy seeds, desiccated coconut, and saffron (if using). Allow the mixture to simmer until it thickens to a desired consistency. For a richer flavor, soak and peel the almonds the night before, slice them, and let them dry. Remove the black skin from the desiccated coconut before grinding it. Adding a touch of pistachio paste elevates the taste and color of the Sheer Khurma.
Tips for the best Sheer Khurma:
- Soaking the nuts and dates enhances their flavor and softens them, making them easier to blend or chop.
- Roasting the vermicelli adds a nutty aroma and prevents it from becoming mushy in the milk.
- Adjust the sugar according to your preference.
- Garnish with slivered nuts and dried fruits before serving.
Juicy Gola Kababs
These flavorful Gola Kababs are made with a blend of aromatic spices and tender ground beef, perfect for enjoying in parathas with a refreshing side of raita and salad.
Ingredients
- 1 kg Ground Beef
- 2 tablespoons Ginger-Garlic Paste
- 2 tablespoons Poppy Seeds (Khash-Khash)
- 2 tablespoons Desiccated Coconut Powder
- 3 tablespoons Gram Flour (Besan)
- Salt to taste
- 9 Cashews
- 8 Sesame Seeds
- 1 tablespoon Cumin Seeds
- 12-15 Dried Round Red Chillies (Button Mirch)
- 2 teaspoons Dried Wild Melon Powder (Kachri Powder)
- 2 Lemons (juice only)
- 1 large Onion (sliced)
- 4-5 Green Chillies (slit)
- 1 tablespoon Garam Masala
- Oil for frying
Instructions
-
Clean the ground beef. Add the ginger-garlic paste, sliced onion, and slit green chillies.
-
Lightly roast the cashews, button chillies, cumin seeds, desiccated coconut, and gram flour. Then add them to the ground beef mixture.
-
Add the kachri powder and lemon juice.
-
Grind the mixture in a chopper until it forms a smooth paste.
-
Shape the mixture into kababs and refrigerate for 1-2 hours.
-
Fry the kababs in oil until golden brown.
-
Serve hot in parathas with a side of green salad and raita.
Nutritious and Delicious Gond Pak Recipe
This recipe guides you through making a delightful and healthy Gond Pak, a traditional Indian sweet treat. This recipe is easy to follow and perfect for enjoying with warm milk, tea, or coffee.
Ingredients
- 250g Edible Gum (Gond)
- 250g Sugar
- 250g Ghee
- ½ cup Semolina (Sooji)
- ½ cup Wheat Flour (Atta)
- 1 tbsp Poppy Seeds (Khash Khash)
- Nuts (Pistachios and Almonds, or as preferred)
Instructions
-
Roast and Crush the Nuts: Begin by frying the nuts in ghee until fragrant. Remove them from the ghee and crush them. Set aside.
-
Fry and Crush the Gond: Using the same ghee, fry the edible gum (gond) until it puffs up. Immediately remove it and crush it. This step is crucial for achieving the right texture.
-
Prepare the Flour Mixture: In the same ghee, fry the wheat flour until it turns golden brown and aromatic. Add the semolina and poppy seeds. Mix well and continue frying for 10-15 minutes, stirring frequently to prevent burning.
-
Combine and Sweeten: Turn off the heat and add the crushed gond and nuts to the flour mixture. Mix thoroughly. Then, add the sugar and mix again until everything is well combined.
-
Store and Enjoy: Your Gond Pak is ready! Transfer it to an airtight container and store it at room temperature. Enjoy this nutritious treat with warm milk, tea, or coffee.
History of Khash
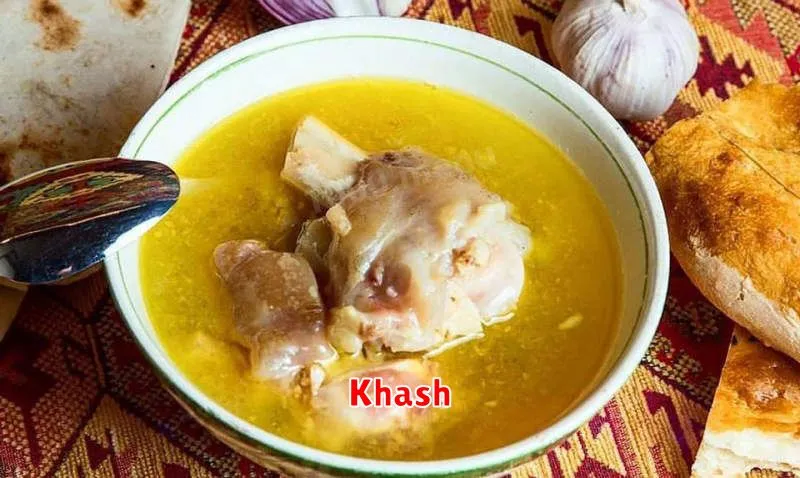
Khash, a traditional beef soup, boasts a rich history spanning centuries and cultures. Its origins are believed to be in the Caucasus region, specifically Armenia, although variations exist across many countries including Georgia, Azerbaijan, and even parts of the Balkans.
While its exact beginnings remain shrouded in some mystery, khash likely emerged as a practical way to utilize every part of a slaughtered animal, minimizing waste. Traditionally made with cow or sheep parts, including the head, feet, and tripe, it was a nourishing and economical meal, particularly during colder months.
Khash wasn’t always considered a delicacy. Its humble origins saw it consumed primarily by the working class and peasantry, providing sustenance and warmth during harsh winters. Over time, however, its popularity grew, evolving from a simple peasant dish to a more celebrated culinary tradition, often enjoyed communally during special occasions and gatherings.
Historically, khash was prepared in large cauldrons, simmered for hours, even overnight, to extract maximum flavor and collagen from the bones and connective tissues. This slow cooking process resulted in a rich, gelatinous broth, highly prized for its perceived restorative properties.
Today, khash continues to be a cherished dish, enjoyed for its unique flavor profile and cultural significance. While preparation methods and regional variations exist, its enduring appeal lies in its connection to history and tradition, offering a taste of the past that continues to resonate with modern palates.
Nutritional Content and Benefits of Khash
Khash, while a delicacy, also boasts a surprisingly rich nutritional profile. This hearty soup is packed with protein, stemming from the long-simmered beef parts, offering essential amino acids crucial for muscle building and repair. It’s also a good source of collagen, which supports joint health and skin elasticity. Additionally, Khash provides vital minerals like calcium and phosphorus, contributing to strong bones.
The gelatinous broth of Khash contributes to its perceived health benefits, often touted as a remedy for joint pain and hangovers. While these claims are largely anecdotal, the gelatin does provide gut-supporting benefits and can contribute to feelings of satiety. It’s important to note, however, that Khash can also be high in cholesterol and fat, primarily saturated fat. Therefore, moderation is key, particularly for those with pre-existing cardiovascular concerns.
Despite its richness, Khash can be a part of a healthy diet when consumed responsibly. Pairing it with fresh herbs and vegetables can boost its nutritional value and provide a balance of flavors. Being mindful of portion sizes and frequency of consumption is important for maximizing its benefits while minimizing potential risks.
Tips for Choosing Quality Beef
Since Khash relies heavily on the flavor of beef, choosing the right cut is crucial. Look for cuts with plenty of connective tissue and bone marrow, such as beef shank, oxtail, or beef feet. These cuts will yield a rich, gelatinous broth essential for authentic Khash.
Pay attention to the color of the beef. It should be a vibrant, cherry-red hue. Avoid meat that looks brownish or grayish, as this indicates age and potential spoilage. The fat should be creamy white or slightly yellowish, not an intense yellow.
The beef should have a fresh, slightly sweet aroma. Avoid any meat with a sour or unpleasant odor. Freshness is paramount when making Khash, as the long simmering process will intensify any off-flavors.
If purchasing from a butcher, don’t hesitate to ask questions about the beef’s origin and age. A reputable butcher can offer valuable insight and help you select the best cut for your Khash.
When buying packaged beef, check the “sell-by” or “use-by” date to ensure optimal freshness. Proper storage is also important. Keep the beef refrigerated until ready to use, and freeze it if you don’t plan to make Khash within a few days.